21x Universal Press Car Ball Joint Repair Tool Service Kit Installer Remover Set
Store Home | New Arrival | Ending Soon | Add to Favourites | View Feedback | Contact us Store Categories Seasonal Discount Automotive Parts Accessories Louver window Mat Protector Fenders Headlight Cargo Cover Crossbar Top Sunshade Cover GRILLE Cigar Switch Strobe Lights & Sirens HIDE-A-WAY Strobe Light Rooftop Strobe Light Grill Strobe Light Siren Speaker
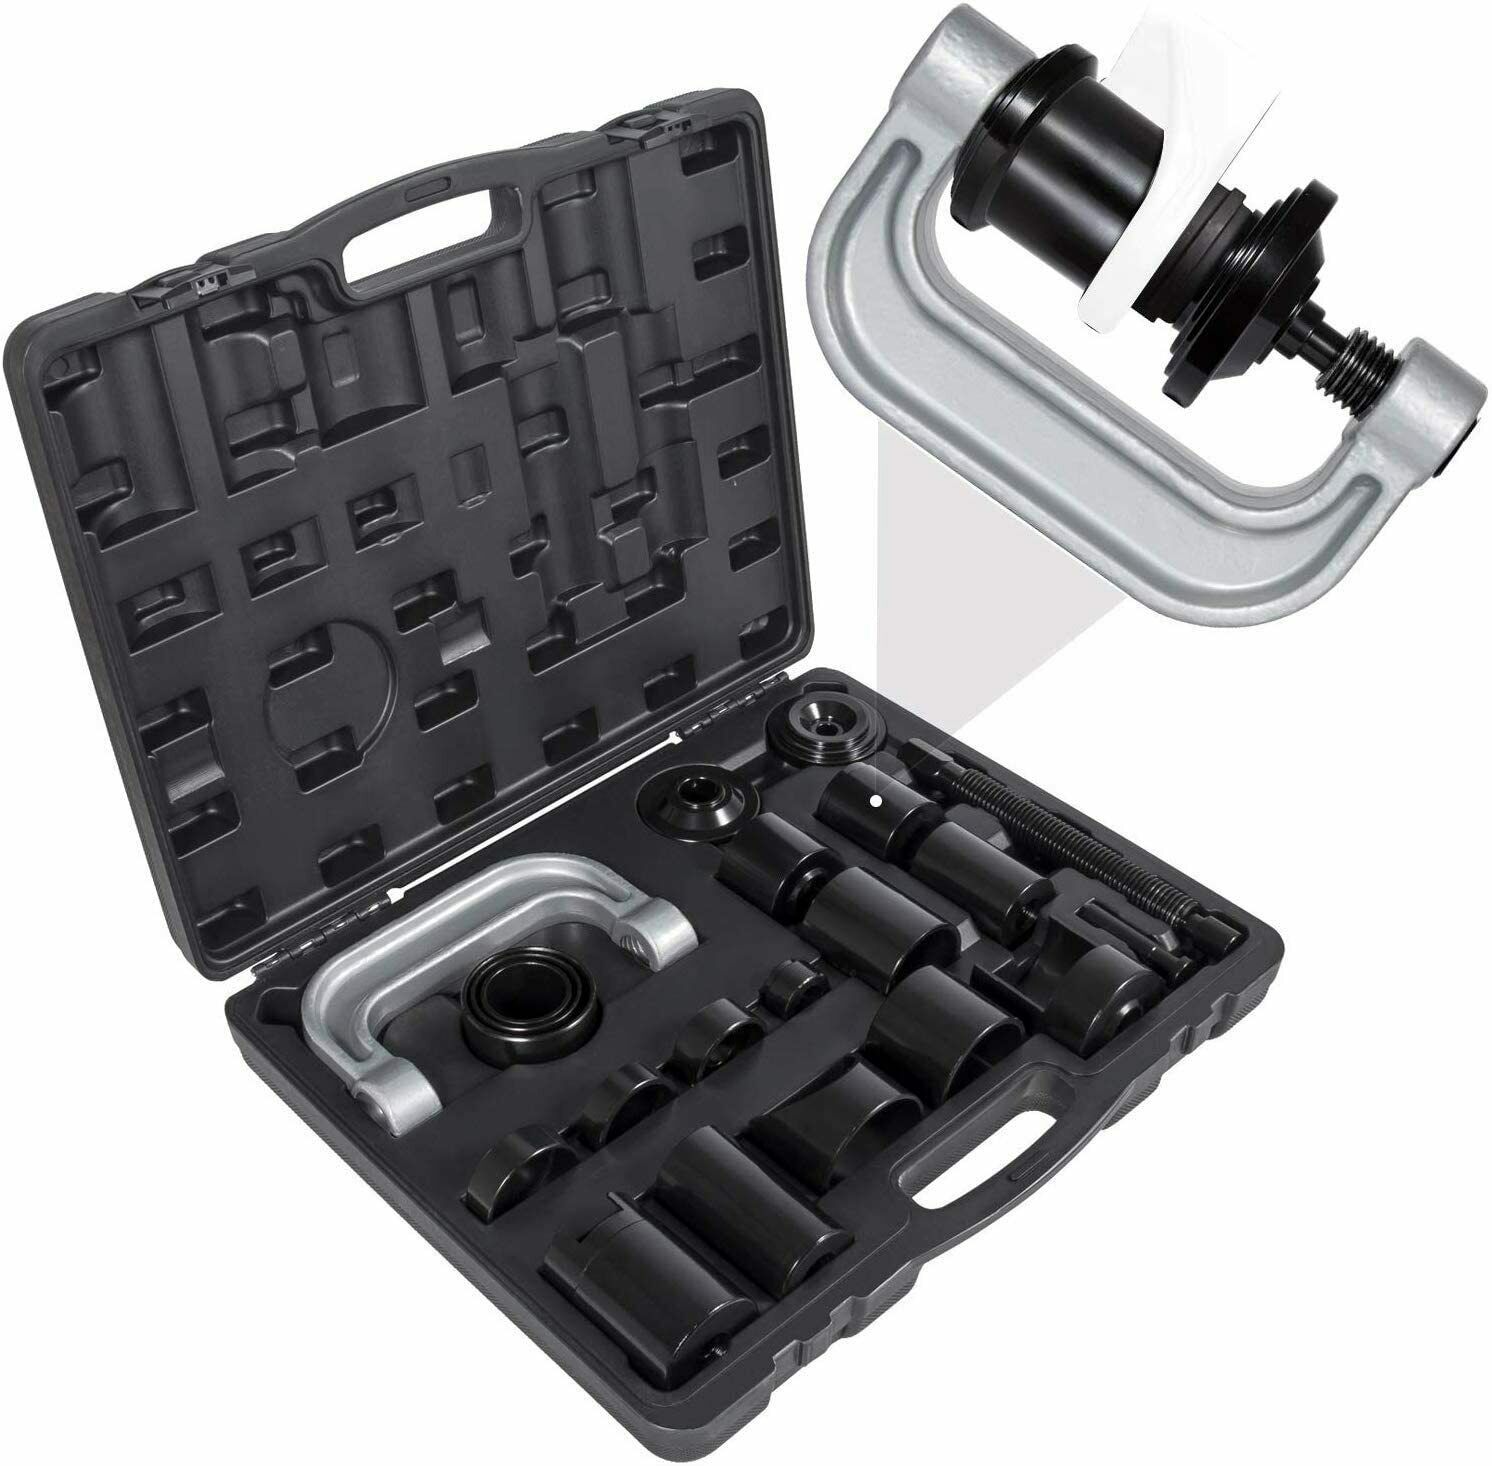
Store Home | New Arrival | Ending Soon | Add to Favourites | View Feedback | Contact us Store Categories Seasonal Discount Automotive Parts Accessories Louver window Mat Protector Fenders Headlight Cargo Cover Crossbar Top Sunshade Cover GRILLE Cigar Switch Strobe Lights & Sirens HIDE-A-WAY Strobe Light Rooftop Strobe Light Grill Strobe Light Siren Speaker Beacon Strobe Light Strobe Light Bar Head Light Tool Other Why Buy From Us 21PCS Ball Joint Auto Repair Tool Service Remover Installing Master Adapter Car ITEMS DESCRIPTION 21PCS Ball Joint Auto Repair Tool Service Remover Installing Master Adapter Car Fitment Use on all cars, light trucks and 4×4 Vehicles that have press fit type ball joints without the need to remove the control arm from the vehicle. Features — Meterial: Made of solid carbon steel with anti-rust finish resisting impact, corrosion and deformation. — Designed to effortlessly remove press-fit parts including ball joints, U-joints, brake anchor pins, and more on most 2-wheel drive (2WD) and 4-wheel drive (4WD) vehicles without removing the control arm from the vehicle. — Forged C-frame press alone can be used to remove and replace universal joints. The blow molded case keeps tools securely organized for conveniently transport . — Servicing most American domestic and imported 2WD/4WD cars and light pickup trucks that have press-fit type ball joints, include 4-wheel drive (4WD) adapter that allows service for 1967 thru current 1/2 and 3/4 ton 4WD vehicles having the Dana 30 or 44 front axle (found on Ford, GM, Dodge, IHC and Jeep vehicles). Remove&Install Brake Anchor Pins To remove the brake anchor pins, remove all lock ring retainers from the Brake Anchor Pins. Position the Ball Joint Press over the brake spider. Tighten the Jackscrew until the anchor pins can be removed. To install the brake anchor pins, insert the brake anchor pins. Then reinstall the lock ring retainers on the brake anchor pin. Unscrew and remove the Ball Joint Press. Assemble & Disassemble a U-joint To disassemble a “U” joint, remove any external and/or internal lock rings. Position the Ball Joint Press around the drive shaft yoke and tighten the Jackscrew until the first bearing is removed. Reposition the Ball Joint Press and remove the second bearing. To assemble a “U” joint, clean all dirt and oil from the yoke area. Align the replacement bearing and Ball Joint Press as straight as possible over the yoke. Press the replacement bearing into the yoke, and reassemble the external/internal lock ring. Reposition the Ball Joint Press and second replacement bearing as straight as possible over the yoke, and press the bearing into the yoke. Reassemble the external/internal lock ring. Remove a Ball Joint Assemble the Ball Joint Press over the vehicle’s control arm. Select the correct size Receiving Tube, and position it under the vehicle’s ball joint. Place the Removal Adapter between the Receiving Tube and the Jackscrew. Then, place the Installation Adapter between the top of the ball joint and the Ball Joint Press. Tighten the Jackscrew until the Receiving Tube contacts the vehicle’s control arm. Check the alignment of all the Ball Joint Kit parts, and continue tightening the Jackscrew until the vehicle’s ball joint is removed. Install a Ball Joint Clean the vehicle’s control arm, and coat the inside diameter of the control arm with a light lubricant. Insert the replacement ball joint as straight as possible into the vehicle’s control arm. Assemble the Ball Joint Press over the vehicle’s control arm. Select the correct size Receiving Tube and position it on top of the vehicle’s control arm. Place the Installation Adapter between the Receiving Tube and the Ball Joint Press. Then, place the Removal Adapter between the ball joint and the Jackscrew. Check the alignment of all the Ball Joint Kit parts. Then, tighten the Jackscrew until the vehicle’s ball joint is firmly sealed. Package Content Ball Joint Remover — M C-Frame Press — F Installer — N Installing Adapter — E Installing Cup B,C Live Center Forcing Screw Plug — S Receiving Cup G,H,O Receiving Tube I, J, K, L, Q, R, T Remover — P Remover Cup — A Removing Adapter D J ackscrew — U Attached with a durable black case for easy storage and transport with great convenience. @ 1 Year Warranty Latest Product Reviews “Used this product to remove ball joints from a 2008 f250 super duty. Made the job a lot easier. Prost was as described. ” a***r “Good variety of adapters for many ball joint types/sizes. ” c***a “Used on a 2004 Chevrolet Silverado worked fantastic. ” b***t “Durable, useful, handy ” m***h Featured Products 10102 U-Joint Puller for Class 7 and 8 Spicer Meritor (Rockwell) Remover Tool 4PCS Ball Joint Service Adapter 7894 Removal Installer Tool Fit for Jeep/Dodge Axle Shaft Vacuum Oil Seal Installer Tool Fit for Ford 2005-2019 F-250/F-350 Universal Outside Thread Chaser 7402 Restore NO. 216884 Standard Die Repair Tool Shipping Payment Return About us Contact us We are US seller, all Items will be shipped out within 2 working days from our West or East warehouses upon receipt of your cleared payment. We are duty off on weekends and other public holidays. International Buyers Please Note: Import duties, taxes and charges are not included in the item price or shipping charges. These charges are the buyer’s responsibility. Please check with your countries customs office to determine what these additional costs will be prior to bidding/buying. We accept PayPal Only. All major credit cards are accepted through secure payment processor PayPal. Payment must be received within 7 business days of auction closing. All of our items come with a 60-day return policy. We insure all our items are new and in excellent condition prior to shipping. In the event that you receive the item is not in the standards above, please contact us via eBay messages. All returns must be in new original condition as received and should be shipped with delivery confirmation. If you need to return, please double check to make sure the item does not work and contact our customer service representative, let us know the detailed problem and send us some photos for confirmation. Then get a unique address to return. Buyer is responsible for return shipping fee, including original freight, handling charges and the return freight when the returns is non-seller mistake (e.g. you purchased wrong model, wrong color or wrong size) We only accept return for original package, please make sure the item has not been used or installed. We reserve the right to refuse any return for any request that does not meet these requirements. We are selling Led lights, auto and motorcycle accessories, home garden and sports equipment. Best price, quality and service. Follow us and get more promotional news. Providing good customer service is our first priority. You are welcome to contact us through eBay message if you have any questions. We normally get back to you within 12-24 business hours. Copyright All Rights Reserved.

Comments
Comments are disabled for this post.